
Build a Pipeline
Add, configure, connect, and save Pipeline nodes from a blank Builder canvas.
The Pipeline controls how Contributors enter a Campaign, complete work, pass review, and deliver accepted results to a Dataset.
Open Builder
- Select Open builder in the Pipeline area of Campaign Detail.
- A new Draft opens directly on a blank dotted canvas. Humanbased does not add nodes automatically.
- Add the required nodes from the four menus at the bottom of Builder.
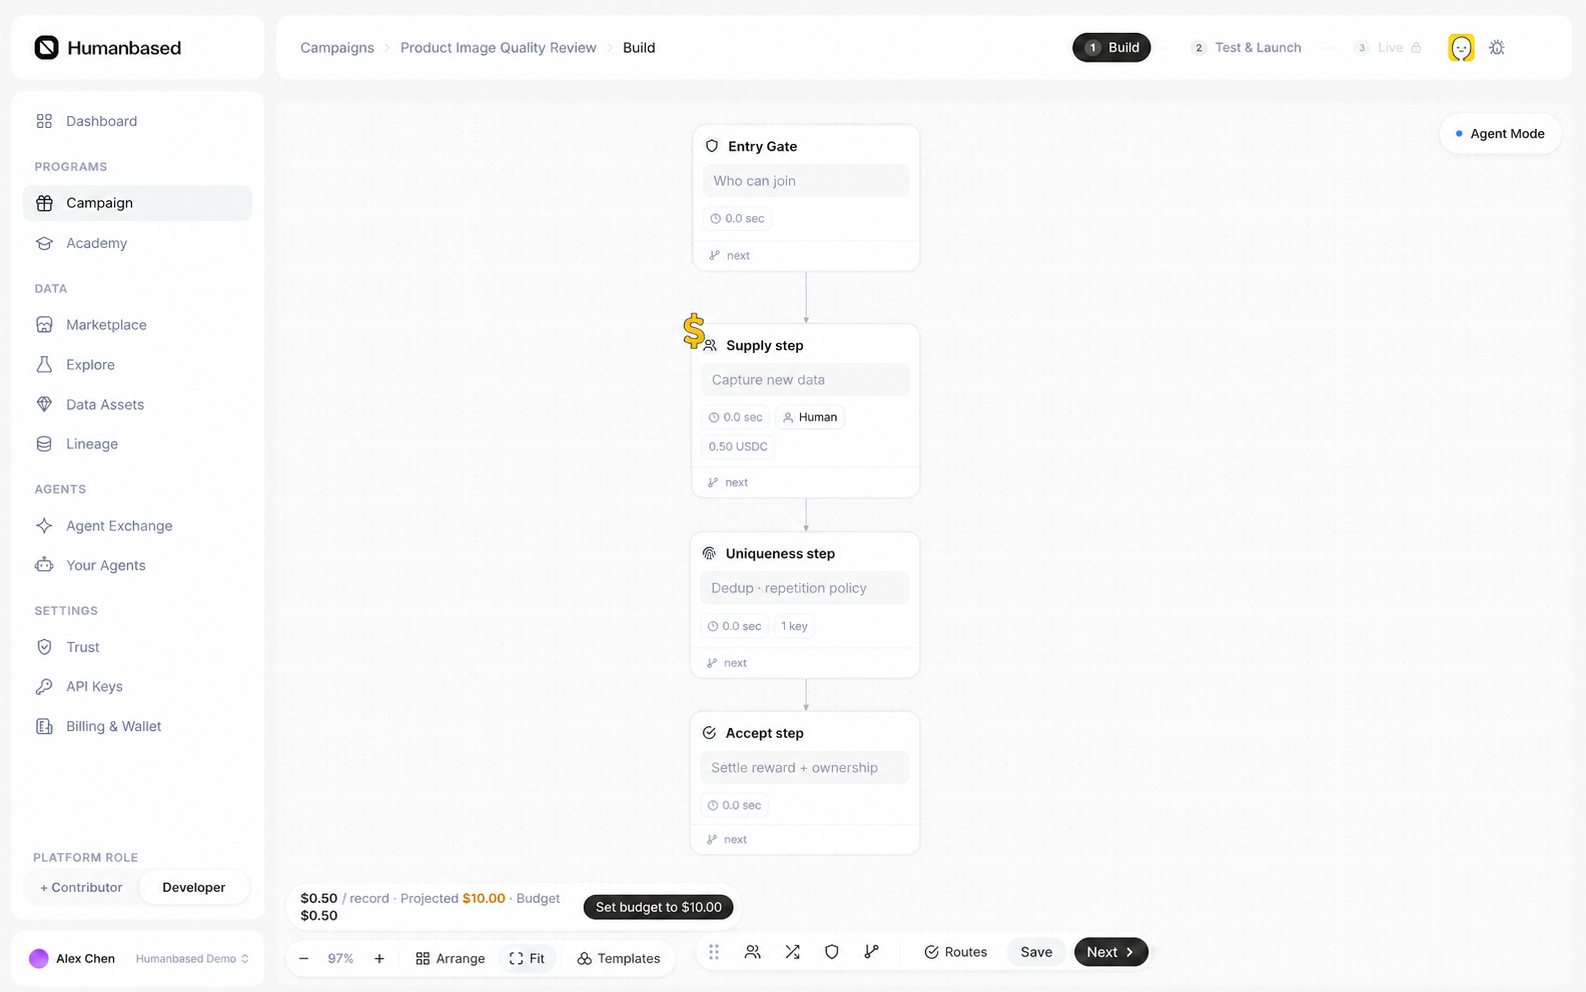
The four menus, from left to right, are:
| Group | Purpose |
|---|---|
| Capture & Work | Add Data Source and Supply to define the input and Contributor work. |
| Transform & Safety | Add Agent Task. Use other nodes only when the menu shows them as available. |
| Quality & Gate | Add Entry Gate, Uniqueness, and Consensus. |
| Exit & Flow | Add Accept, ETL, Sink, and Routes. |
Build the first runnable path
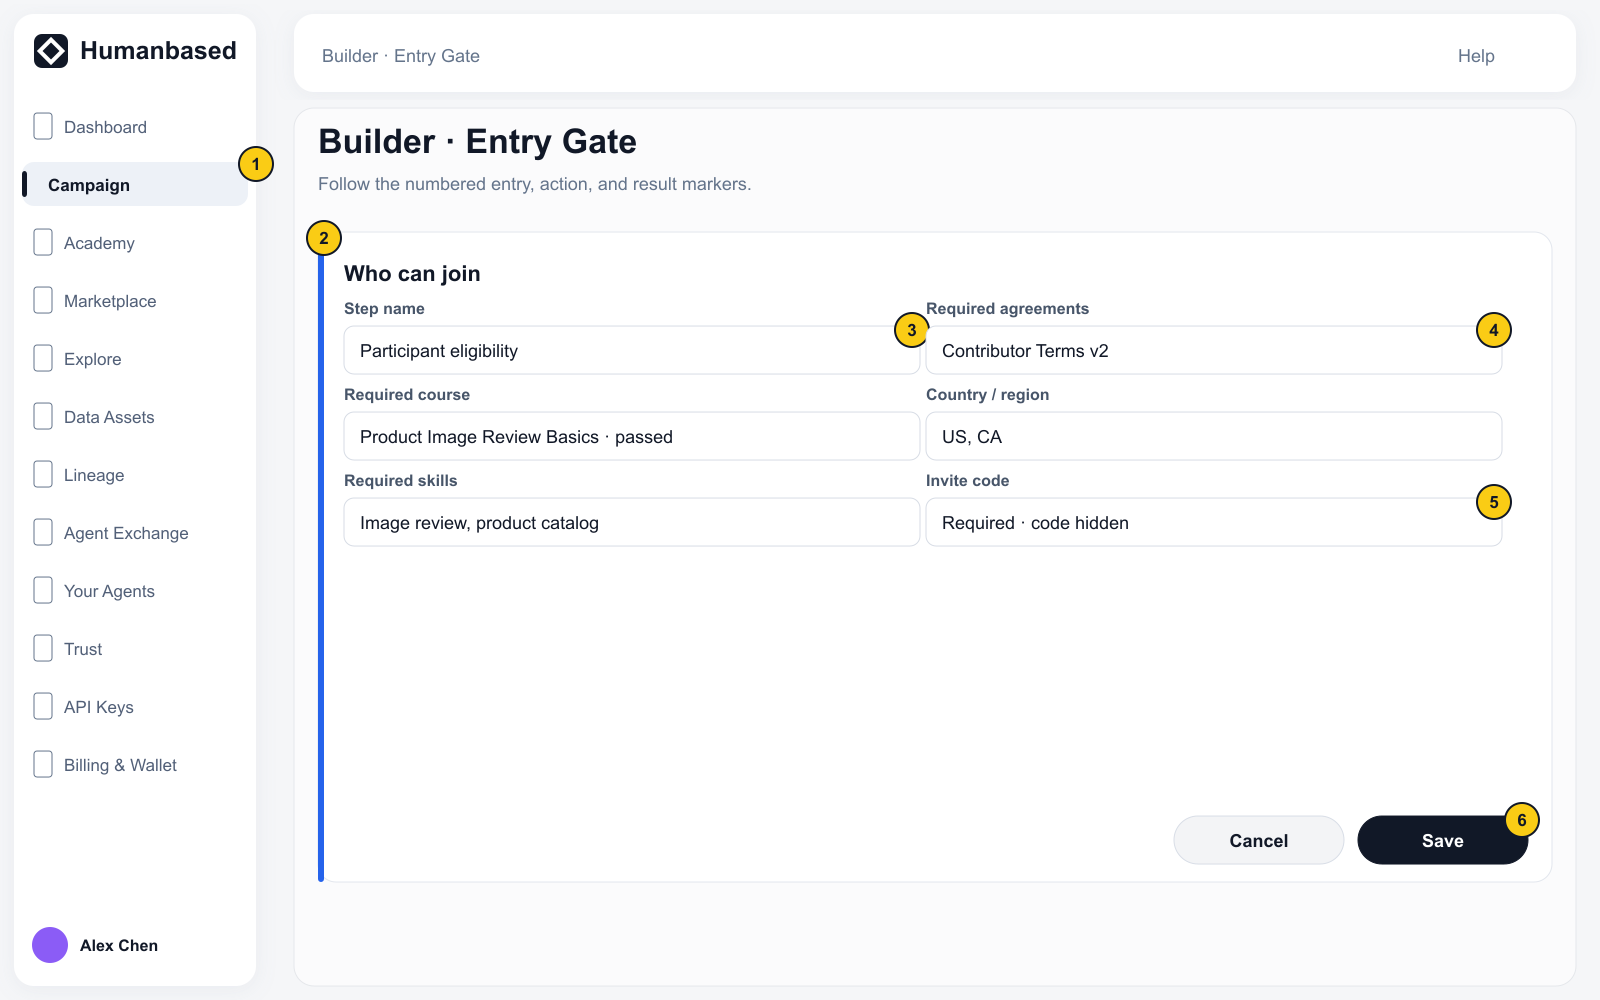
- Select Quality & Gate → Entry Gate, configure the participation requirements, and save.
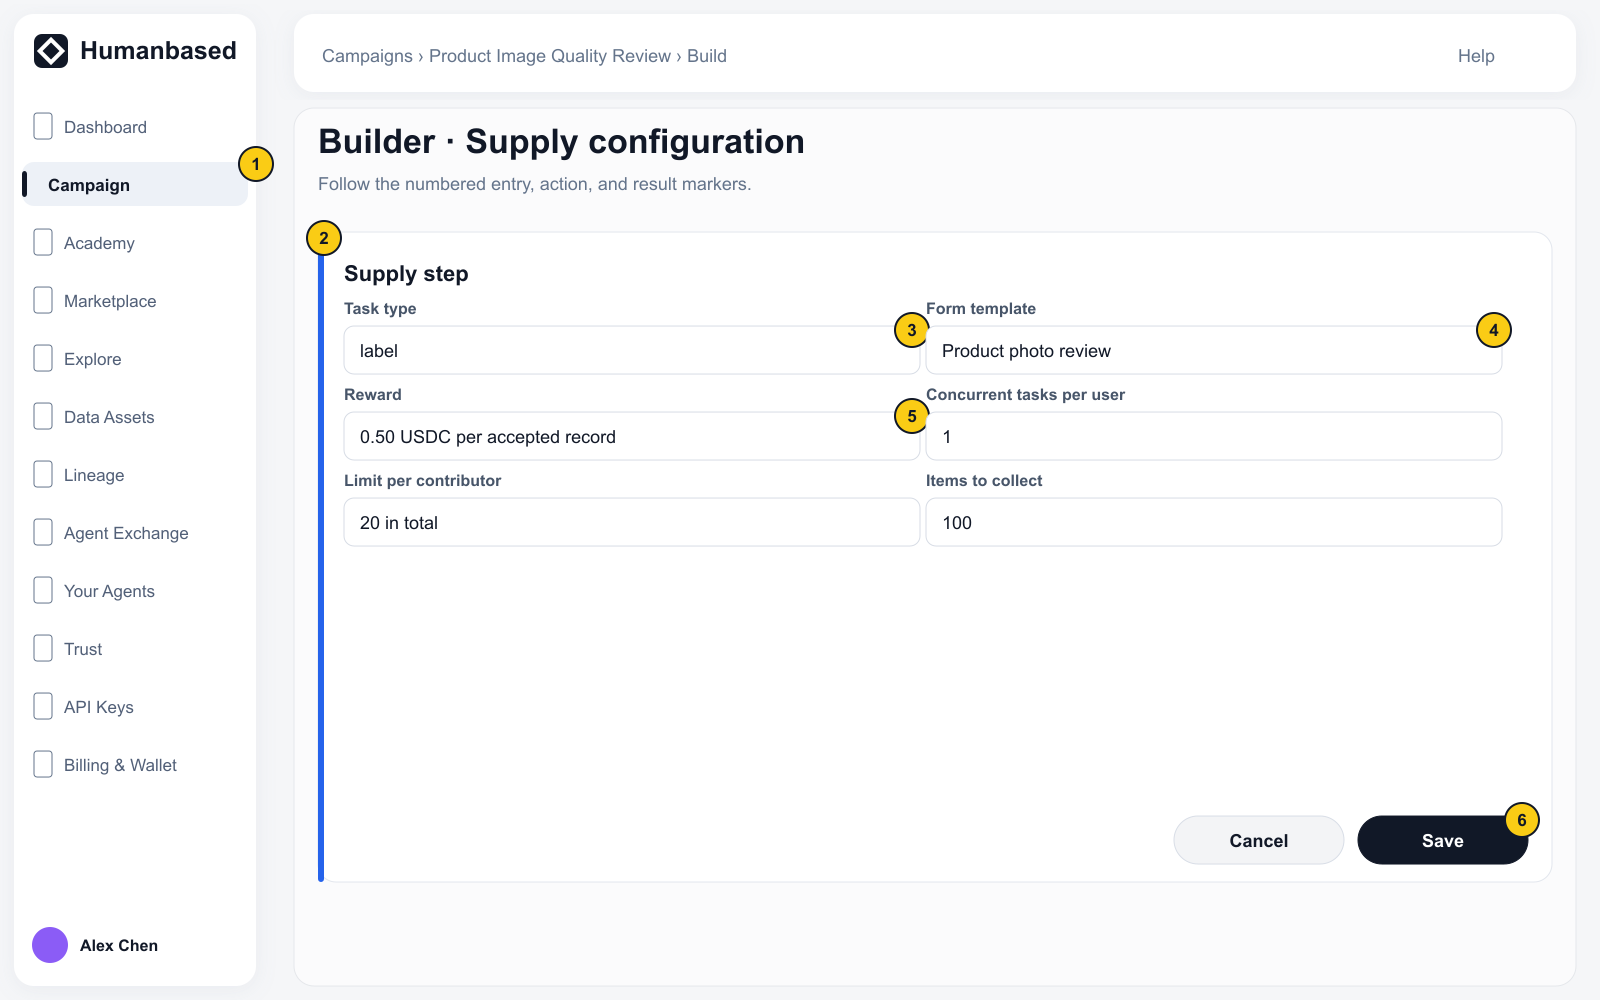
- Select Capture & Work → Supply, configure the Task type, Form template, Reward, Task limits, and Items to collect, then save.
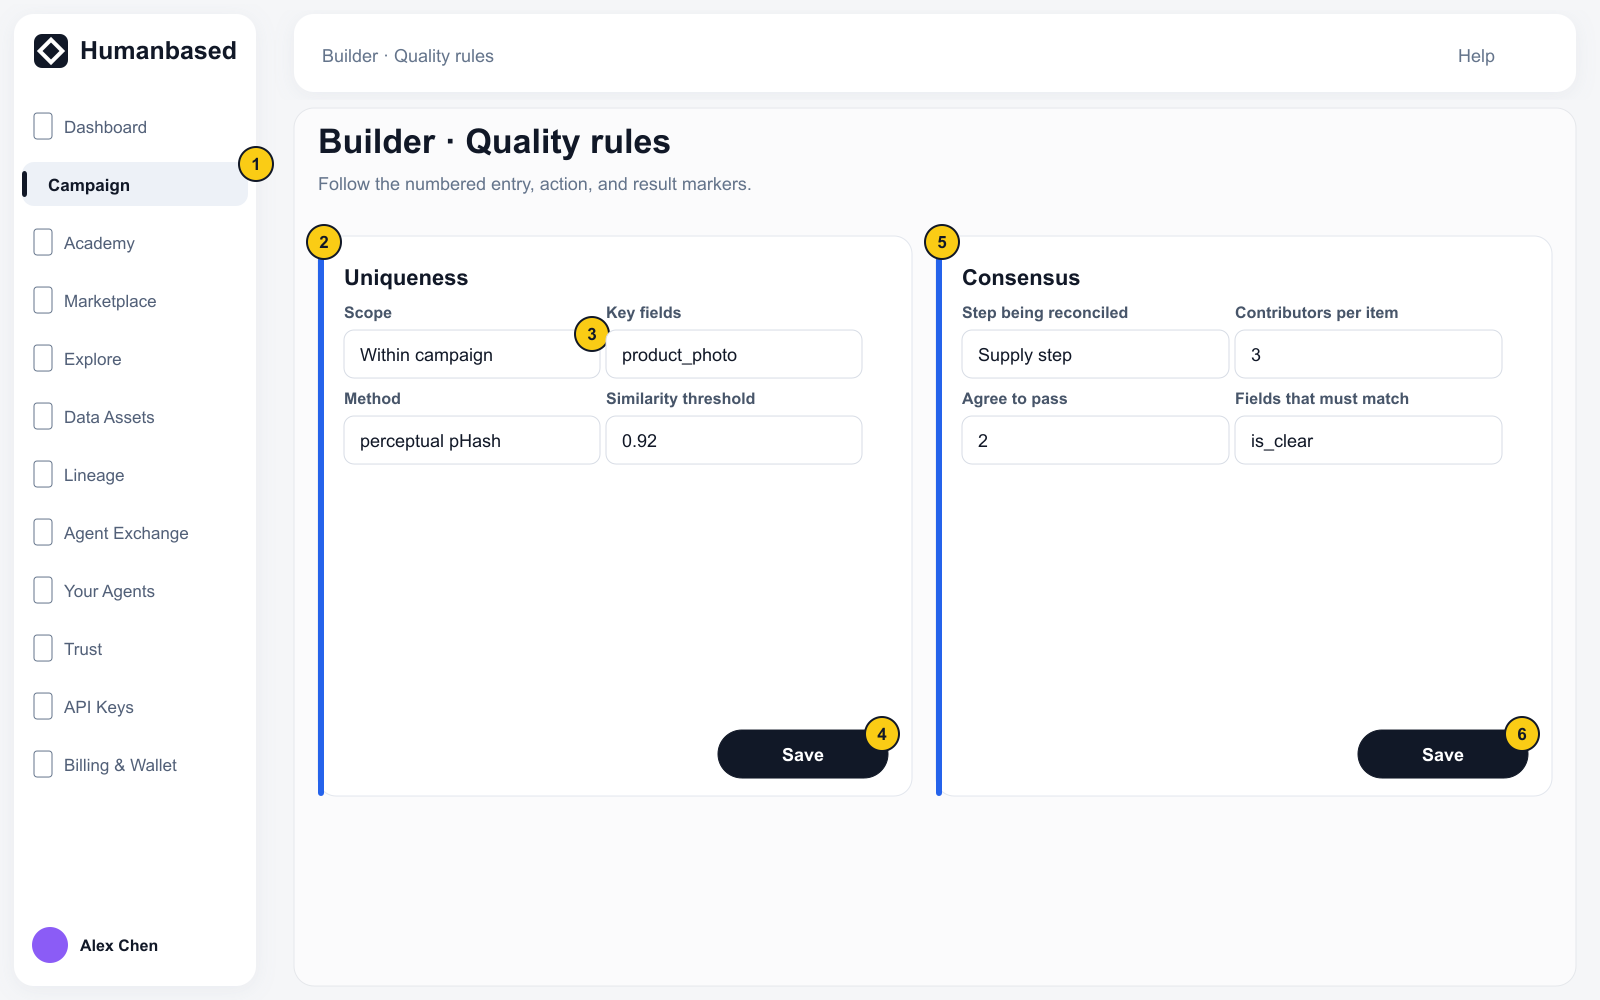
- Add Uniqueness or Consensus when the Campaign requires duplicate detection or agreement across Contributors.
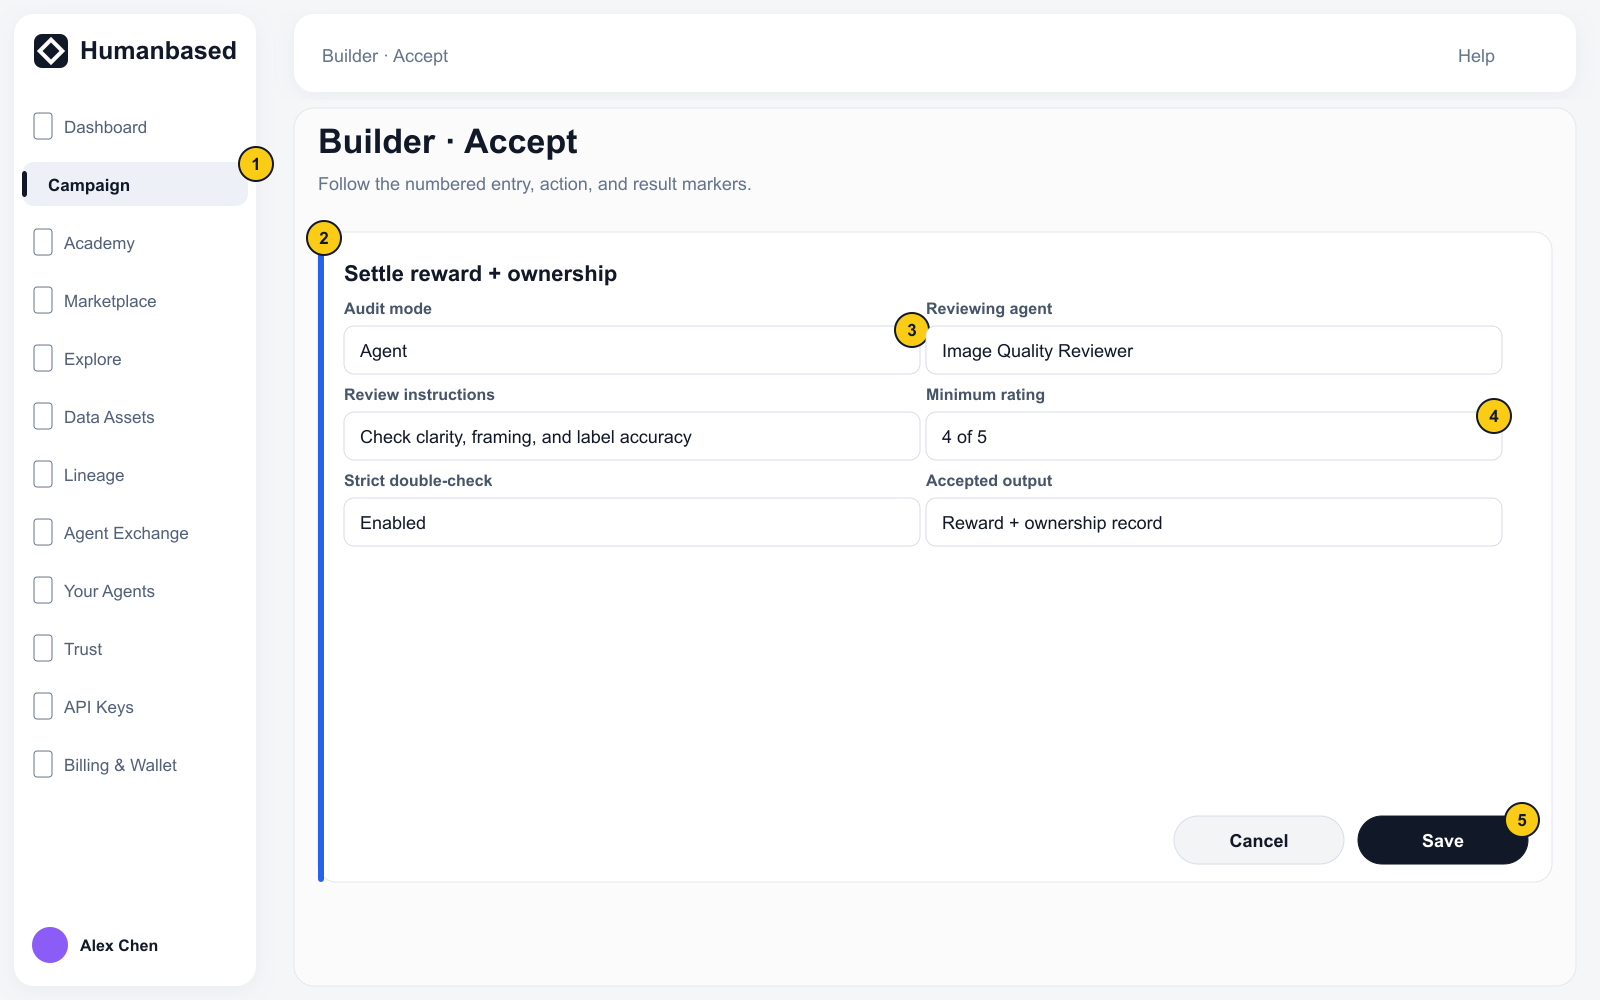
- Select Exit & Flow → Accept, configure the acceptance method, and save.
- Save the minimum launch path after Accept. Add Sink only when the Campaign must write accepted records to a Dataset; add ETL before Sink when delivery fields require transformation.
- Drag from an upstream connection handle to a downstream node to create a directed path.
- Select Arrange to check the order and Fit to view the complete graph.
The following complete fixture views show the configuration entry and save result for each required node. The numbered markers follow the same order as the instructions above.
A first direct-collection Pipeline is usually:
Entry Gate → Supply → AcceptFor an existing CSV that is labeled and then validated:
Entry Gate → Data Source → Supply (label) → Supply (validate) → Accept → SinkSave correctly
Builder has two types of save action:
- Save inside a node configuration dialog saves that node's fields.
- Save at the bottom of Builder saves node additions, deletions, connections, and layout.
Complete every applicable save and wait for confirmation. Select Next only after the graph is saved and the applicable checklist items are complete.
Return to the complete Builder image under Open Builder and confirm that every saved node and connection remains visible before selecting Next.
Completion state
Builder confirms that the Pipeline is saved, and the nodes form a directed path that Builder can validate.